
Commercial Roofing Service Call Checklist for Contractors
Ensure profitability with our comprehensive commercial roofing service call checklist. Maximize inspections and minimize claims today!

A missed inspection is not just an oversight. It is a liability. Commercial roof failures rank second among the most expensive building envelope claims, with averages running from $22,000 to $68,000 before secondary damage even enters the picture. Your commercial roofing service call checklist is the single tool that stands between a routine visit and a claim that wipes out a job’s margin. This article gives you a contractor-grade checklist covering inspection criteria, documentation standards, closeout protocols, and situational adjustments so every service call you run is defensible, efficient, and profitable.
Key Takeaways
- Inspection history protects profit: 81% of roof failures happen on roofs with no documented inspection in the past 24 months.
- Six zones define every inspection: Membrane, flashing, drainage, penetrations, equipment curbs, and perimeter must be evaluated on every service call.
- Documentation drives insurance outcomes: Carriers deny or reduce claims when dated records and photos are missing from the file.
- Reports must be delivered fast: Inspection reports should land with the client within 24 to 48 hours to support timely insurance and warranty processing.
- Digital tools cut closeout time: Linking photos to specific roof zones in a digital system enables faster work orders and trend analysis across properties.
The Commercial Roofing Service Call Checklist: Key Inspection Criteria
Every solid service call starts with knowing exactly what you are evaluating before your boots hit the roof. There are six zones that must appear on every commercial roofing inspection checklist, regardless of building type or system age.
The six critical zones:
- Membrane: Look for cracks, blisters, punctures, open seams, and surface erosion. On TPO and EPDM systems, pay close attention to weld integrity at laps.
- Flashing: Check all base and counter flashing at walls, curbs, and parapets for separation, lifting, or corrosion.
- Drainage: Inspect every drain, scupper, and gutter for blockage. Ponding water sitting more than 48 hours after rain is a structural concern, not just a cosmetic one.
- Penetrations: Every pipe, conduit, or HVAC line that breaks the roof plane is a potential entry point. Inspect all pipe boots and pitch pockets for cracking or voids.
- Equipment curbs: HVAC units, exhaust fans, and skylights sit on curbs that move with thermal cycling. Look for separation at the curb-to-deck connection and deteriorated sealant.
- Perimeter: Coping caps, edge metal, and gravel stops take the most wind load. Verify fasteners are set and sealant joints are intact.
Timing matters as much as thoroughness. Semi-annual inspections in spring and late fall are the baseline standard. Add an immediate post-weather event check after any storm producing wind speeds above 50 mph or hail reports in the area. Do not wait for the next scheduled cycle.
Your inspection header should capture the date, weather conditions at time of inspection, inspector name and credentials, and the date of the last major roof event or repair. This information becomes the foundation of your documentation trail when a warranty or insurance question surfaces later.
Pro Tip: Ask the building owner or property manager for the prior inspection report before you start. Comparing it to your current findings lets you identify deterioration trends and gives you a stronger story to tell when recommending repairs.
1. Document the Pre-Call Condition Before You Touch Anything
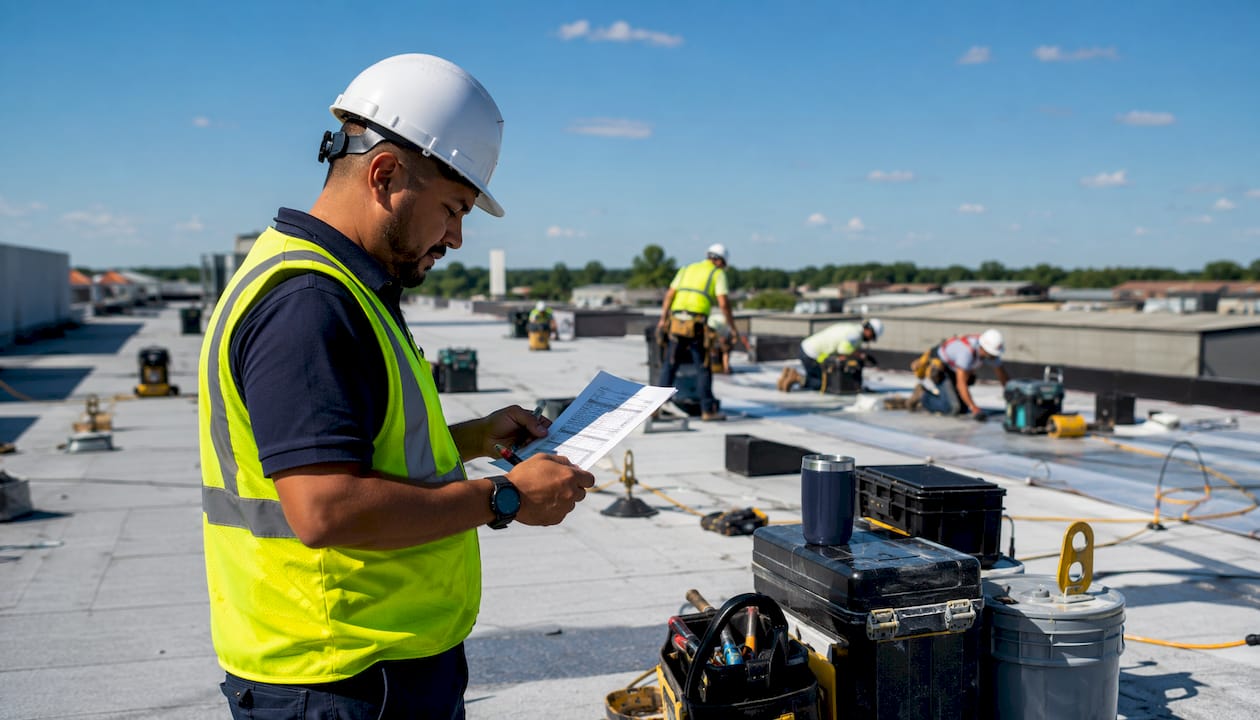
The first item on your commercial roof repair checklist is not a tool. It is a camera. Walk the roof perimeter and photograph the overall condition from each corner before any work begins. This creates a baseline that protects you if a dispute arises about pre-existing damage.
Capture the date stamp in every photo. Note weather conditions, standing water locations, and any obvious storm debris. This step takes ten minutes and has prevented six-figure disputes for contractors who do it consistently.
2. Inspect the Membrane for Surface and Seam Failures
Work the membrane in a systematic grid pattern rather than random spot-checking. Move from one edge to the opposite edge in parallel passes about three feet apart. This approach catches the blisters and micro-cracks that random walking misses.
At every seam, press down firmly with your hand. Any seam that moves, lifts, or shows daylight underneath is a documented deficiency. Call it out with a photo and a GPS pin or a measured reference from a fixed point on the roof.
3. Evaluate All Flashing with Deliberate Force Testing
Flashing failure is the leading cause of interior water damage on commercial properties. Do not just look at it. Pull it. Apply light upward pressure at base flashing terminations and counter flashing laps. Secure flashing does not budge. Failed flashing tells you immediately.
Document every failed termination bar, every lifted edge, and every open seam in your report with a close-up photo. Include a scale reference object in every defect photo, a tape measure or hard hat works well, so repair crews and insurance adjusters can calibrate the size of the problem from the image alone.
4. Clear and Rate Drainage Capacity
A clogged drain on a flat roof is a ticking clock. Pull debris from every drain, test flow by pouring a water bottle down the drain, and note whether the drain body itself is loose or has a broken clamp ring.
Rate each drain on a simple three-point scale: clear and functional, partially restricted, or blocked. This rating goes into your report and drives the priority level assigned to each finding. Property managers respond better to a tiered system than to a list of vague concerns.
5. Check Every Penetration and Pitch Pocket
Penetrations are the points of highest failure concentration on most commercial roofs. Each one gets its own photo and condition note. For pitch pockets, check filler level. Pitch that has settled below the pocket rim needs to be topped off before it voids the manufacturer warranty.
Pipe boots crack faster than any other rooftop component. A boot that shows any surface fracture, even a hairline, gets flagged as an active risk because water infiltration begins at those fractures long before a visible leak appears inside the building.
Pro Tip: For any roof over 10 years old, bring an infrared moisture meter to identify trapped moisture in the insulation beneath penetrations. Visual inspection alone misses saturated decking until it has already caused structural softening.
6. Assess Equipment Curbs and HVAC Pads
Every HVAC unit on a commercial roof is also a maintenance access point, and that means it gets more foot traffic than any other zone. Check for worn or compressed walk pads, cracked sealant at the curb-to-unit connection, and any visible rust streaking that signals metal deterioration inside the curb structure.
Log the make and approximate age of each unit if the property manager cannot provide a maintenance history. This data supports your recommendation when an aging unit’s curb needs replacement rather than repair.
7. Inspect the Perimeter Edge Metal and Coping
Wind events start at the perimeter. Coping caps that are loose or missing sealant at end joints create an entry point that causes lateral water migration under the entire roof membrane. This is the failure mode that produces the largest insurance claims because damage spreads far from the visible entry point.
Test every coping cap by pressing down on each end. Any movement gets documented. Pull out loose fasteners and note whether the substrate is rotted or solid. That distinction determines whether a re-fastening repair is viable or a full perimeter rebuild is required.
8. Log Safety Compliance and Roof Access Conditions
Your commercial roofing inspection checklist is also a safety document. Note whether the roof access hatch, ladder, or stairwell meets OSHA requirements. Flag any edge conditions without compliant guardrails or warning line systems.
This protects your crew on the current visit and gives the building owner documented evidence of a safety deficiency they are now responsible for correcting. It also positions you for the safety remediation work if they want to address it.
Comparing Documentation Standards: What Your records Must Actually Cover
Not all documentation is equal when it comes to protecting your client and your business. Here is how the levels stack up.
- Basic visual notes
- Written observations only, with no photos
- Weak support for insurance claims — claims are often denied
- Does not meet most manufacturer warranty requirements
- Best used for internal reference only
- Photo-documented report
- Includes timestamped photos, zone labels, and condition ratings
- Moderate to strong insurance claim support
- Meets standard warranty requirements
- Best for standard service calls
- Full compliance package
- Includes:
- Photos with scale references
- Corrective action plan
- Inspector credentials
- Carrier-level narrative
- Strong insurance claim support
- Meets major manufacturer and carrier requirements
- Best for high-value roofs and post-storm claims
- Includes:
- Digital trend report
- Includes:
- Zone-linked photos
- Weather event correlation
- Multi-visit comparison tracking
- Strongest insurance claim support
- Exceeds most warranty and compliance requirements
- Best for PM contracts and repeat service clients
- Includes:
Choosing certified inspectors aligned with the building’s specific roofing system type is not optional for high-value properties. Verify that anyone you send to a commercial roof holds NRCA or IIBEC credentials and carries at least $1 million in general liability coverage. Residential-level credentials and lower coverage amounts do not satisfy commercial insurance carrier requirements.
Structured inspection programs also protect manufacturer warranties that require documented annual inspections. Letting that documentation lapse voids the warranty without the building owner realizing it until they file a claim.
Best Practices for Managing Service Calls From Start to Closeout
Operational efficiency in commercial roofing service calls comes down to process discipline, not just technical skill. Here is how to run service calls that close fast and pay fast.
- Build your closeout package from day one. Service checklists and closeout documentation should be started at project kickoff, not the week before final billing. Collect warranties, product data sheets, and inspection records incrementally throughout the job.
- Schedule around weather windows, not just client availability. Wet surfaces and high winds compromise both inspection accuracy and crew safety. Build weather review into your dispatch process as a standing step.
- Deliver reports within 48 hours. Timely report delivery keeps insurance processing moving and signals professionalism that property managers remember when it is time to renew a maintenance contract.
- Communicate findings in plain language. Your report goes to property managers, not roofing engineers. Write condition summaries in terms of risk level and cost consequence, not technical specifications alone.
- Automate follow-up tracking. A finding logged and forgotten is a liability. Use a system that flags open deficiencies until they are either addressed or formally declined by the client in writing. Manual processes create the exact gaps that kill margins and delay payment.
- Know your closeout timeline. Complex projects may require three weeks or more to assemble a complete closeout package. Build that timeline into your contract and billing schedule from the start so payment is not stalled waiting on paperwork.
Situational Adjustments: Tailoring Your Checklist for Different Scenarios
A standard checklist is the floor, not the ceiling. Here is how to calibrate it based on what you are actually dealing with.
- Older roofs (15-plus years): Move from semi-annual to quarterly inspections. Increase moisture scanning at penetrations and field seams. Expect accelerated deterioration between visits.
- High-traffic roofs: Any roof with regular foot traffic for HVAC maintenance or other service gets walk pad inspections added to every visit. Document traffic patterns and recommend protection board installation if pads are absent.
- Active leaks: Stop the checklist process. Active roof leaks require immediate professional response beyond what a standard inspection protocol covers. Leaks cause insulation, decking, and interior finish damage rapidly. Escalate to emergency inspection mode with appropriate documentation.
- Flat vs. metal roofs: Flat systems need drainage and ponding focus. Metal systems need fastener torque checks, panel lap sealant inspection, and paint/coating condition assessment added to the standard zones.
- Prioritizing repairs from findings: Rate every finding as immediate (life safety or active water entry), near-term (within 90 days to prevent escalation), or long-term (monitor and address in the next inspection cycle). This tiered system helps property managers budget and helps you schedule follow-up work efficiently.
The 8:1 ROI on semi-annual inspections is a real number you can put in front of a reluctant property manager. A $500 inspection preventing $4,000 in accelerated repairs is straightforward math. Leaks left through a winter run $8,000 to $22,000 in interior remediation costs on top of the roof repair itself.
Put Your Checklists to Work With a System Built for Roofing
Running a tight commercial roofing service call checklist is one thing. Keeping every photo, finding, report, and follow-up connected across your entire operation is another. Fragmented tools, spreadsheets, and disconnected apps are where checklist discipline breaks down and profit leaks out.
Terial is built specifically for commercial roofing contractors who are done managing operations across five different systems. From automated inspection reports that deliver to clients in under an hour, to a field service application your crews actually use on the roof, everything ties back to one real-time operating system. No lost photos. No missed follow-ups. No stalled invoices. Explore Terial’s platform to see how leading contractors are turning structured service calls into a growth engine.
FAQ
What should every commercial roofing service call checklist include?
Every checklist must cover the six core roof zones: membrane, flashing, drainage, penetrations, equipment curbs, and perimeter. It should also include timestamped photo documentation, safety compliance notes, and inspector credentials.
How often should commercial roofs be inspected?
The standard is semi-annual inspections in spring and late fall, plus an immediate post-storm check after any significant weather event.
What documentation do insurance carriers require after a service call?
Carriers require dated records, photo documentation with scale references, corrective action histories, and inspector credentials showing NRCA or IIBEC certification with at least $1 million in general liability coverage.
When should a checklist be escalated to an emergency inspection?
Any time there is an active roof leak, stop the standard checklist process and escalate immediately. Active leaks cause rapid damage to insulation, decking, and interior finishes that a routine inspection protocol is not designed to address.
How do I build a close out commercial roofing project checklist efficiently?
Start collecting warranties, product data, and inspection records from the first day of the project, not at the end. Build the closeout package incrementally so final documentation assembly takes days, not weeks.
Recommended




Book a personalized demo
Get a 30-minute demo tailored to how you run your commercial roofing business

“Making the switch to Terial has greatly exceeded my expectations and has already had a meaningful impact on our team’s productivity. Terial has significantly reduced the amount of time required to complete many of our day-to-day operational tasks, allowing our team to focus more on serving our customers.”

